Facebook has its own email service which was launched a year back however this service was intentionally used to communicate socially on Facebook and Not as an email Id like Gmail and Yahoo. You can setup and create @Facebook.com E-mail Address. You can use this E-mail Address for sending and receiving messages. But in this format of the E-mail Address, you do not have the general fields like subject lines, CC (Carbon Copy) and BCC (Blind CC) which you find in Gmail, Yahoo Mail.

Facebook gives its users E-mail Address which match their public usernames like: username@facebook.com. For Eg: If your Facebook username is roshan.karkera
(Facebook/roshan.karkera), then your new Facebook email address will be roshan.karkera@facebook.com. It is necessary that you have a Username for your Facebook Account. If not, go to Account Settings and you can setup your Facebook Username URL. You need to be careful while setting up your Username as you can’t change it once it is done..
Follow the steps given below to create @Facebook.comE-mail Address:
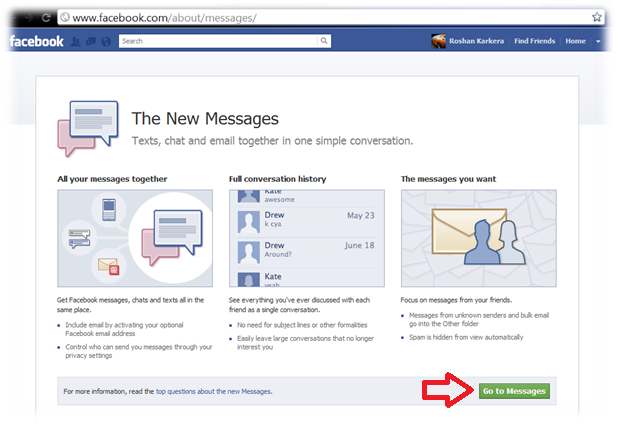
1. Login to your Facebook Account and click here to open request web page. Click on invite button at bottom right. When your invite is accepted, Click on Go to Messages in your Facebook Account. On the Messages page, you can see Claim your Facebook email in the top section of your Facebook Account.
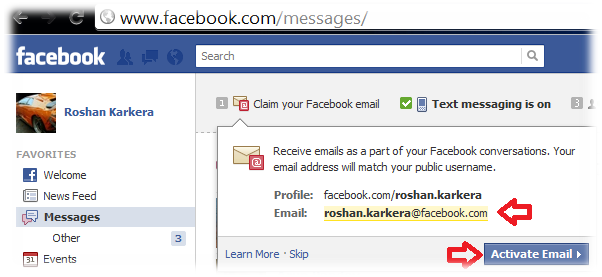
2. Click on Claim your Facebook email

3. You can see you email id here which is been set acceding to your Facebook username, Now Click on Activate Email.
4. Click on Next will allow you to “Turn on text messaging”, which you can activate or skip. As you see that you have successfully created your @Facebook Email Address.

5. Click on New Message to Send Mail, Enter the ID in ‘TO’ Field and Type your Message and Click on Send. Your message will be delivered to recipient.
Related Post:
0 comments:
Post a Comment